Tuesday, January 6, 2026

Simple Sourdough Bread in a Loaf Pan


Full disclosure, I am a long way from being a sourdough expert (well, I'm pretty good at the eating part but the rest I'm strictly amateur)


I started doing the traditional Dutch Oven (DO) method with a beautiful castiron DO and it does make a lovely crusty and tasty loaf... but it's always round.  As an eating expert I know my sandwiches are not round so this wasn't working for me. Plus it is very challenging to cut those round loaves. 


I heard of the loaf pan method where you get two identical loaf pans and use one as a cover over the loaf to get  that DO effect. I gave it a try and haven't looked back.

I won't get into the whole starter thing here, there are lots of experts out there you can learn that from if you don't already have some. Here's a video that can get you started on your starter (https://www.youtube.com/watch?v=-9Osn7JsP1Y)  One thing I will mention, always save the discard, there are plenty of things you can bake with it. 

So, on to the process.  Here's how I do it (I'll use my regular weekly schedule as a sample but of course you can do it any way that works for you)...

SUNDAY AM

Take the starter out of the fridge and feed it. I go with the 1:1:1 ratio of water, flour and starter (there are other opinions) put an elastic around the jar to mark the level of starter (I use 50 gms of each so I have lots of starter when I need it). Then go about my day.

SUNDAY PM

Assuming the starter has ripened (grown close to double it's size and getting bubbly) I start the next step.  

In a bowl mix 50 gms of the active starter with 350 gms of water and give it a stir. Then add 500 gms of flour (I use unbleached all purpose flour but that's only one way to go) and 10 gms (2 teaspoons) of salt. Mix it until it forms a shaggy dough with no dry flour (adding a few dribbles of water can help sometimes). Take a break for an hour, you deserve it.

Now the fun part, with wet hands (I have a full measuring cup of water to dip my hands into as needed)... stretch and fold the dough, make a quarter turn and do that again, all they way around the bowl. (if you don't know stretch and fold check out the video  https://www.youtube.com/watch?v=QYzxulQY1Gc ). Do that again in about 30 minutes and a third time 30 minutes later. Now you can cover the bowl and tuck it (and yourself) in for the night (about 7-10 hours should be enough for the dough to have risen an additional 50-75% of it's original size).  

MONDAY AM

You will now have a soft and sticky dough that can be challenging to handle. I turn it out onto a well floured counter top then pull up the corners like the underside of a mushroom and eventually pulling them together to give tension to the downward facing portion of the dough... pinch all those corners together and using a bench scrapper flip the loaf over so the pinched side is now down.  Use the bench scrapper to coax the dough into a loaf shape, you can do this by putting a small dusting of flour beside the dough, then using the scraper to gentle push it under the dough as you gently shape the loaf.  Let it rest for a bit.

Get your two loaf pans ready. Take a piece of parchment paper big enough to overflow a loaf pan and crumple it up very tightly. When you loosen it, it will be much easier to line the pan now that it's been crinkled. Now using your bench scraper and a gentle hand, scoop up the loaf and set it into the pan (it will not be pretty but will settle). Take the other pan and check that if fits okay (you may neeed to fold back or trim the parchment paper) then set it aside.

Cover the loaf with a damp towel of plastic wrap (very loosely). Let it rest for 1-2 hours. That's a big range I know, but conditions like temperature of the room, age of your starter etc all impact this so you need that flexibility. 

Preheat the oven for longer than you might think. I like to have my oven up to full heat for a minimum of 15 minutes before baking. 

When everything is ready, sprinkle some flour over the loaf (this is to help your razor blade slide) then score the top of the loaf with a razor blade to allow room for the crust to expand.  Then squirt some water into the second loaf pan to add steam during the baking, fit it over the loaf and carefully put everything into the oven for 20 minutes at 450 degrees. After 20 minutes, remove the top pan and continue for an additional 25 minutes. The top should now be nicely browned and the internal temperature of the loaf should be getting over 200 and closer to 210. Turn out onto a rack to cool and avoid the tempation to cut it when it's hot... ENJOY


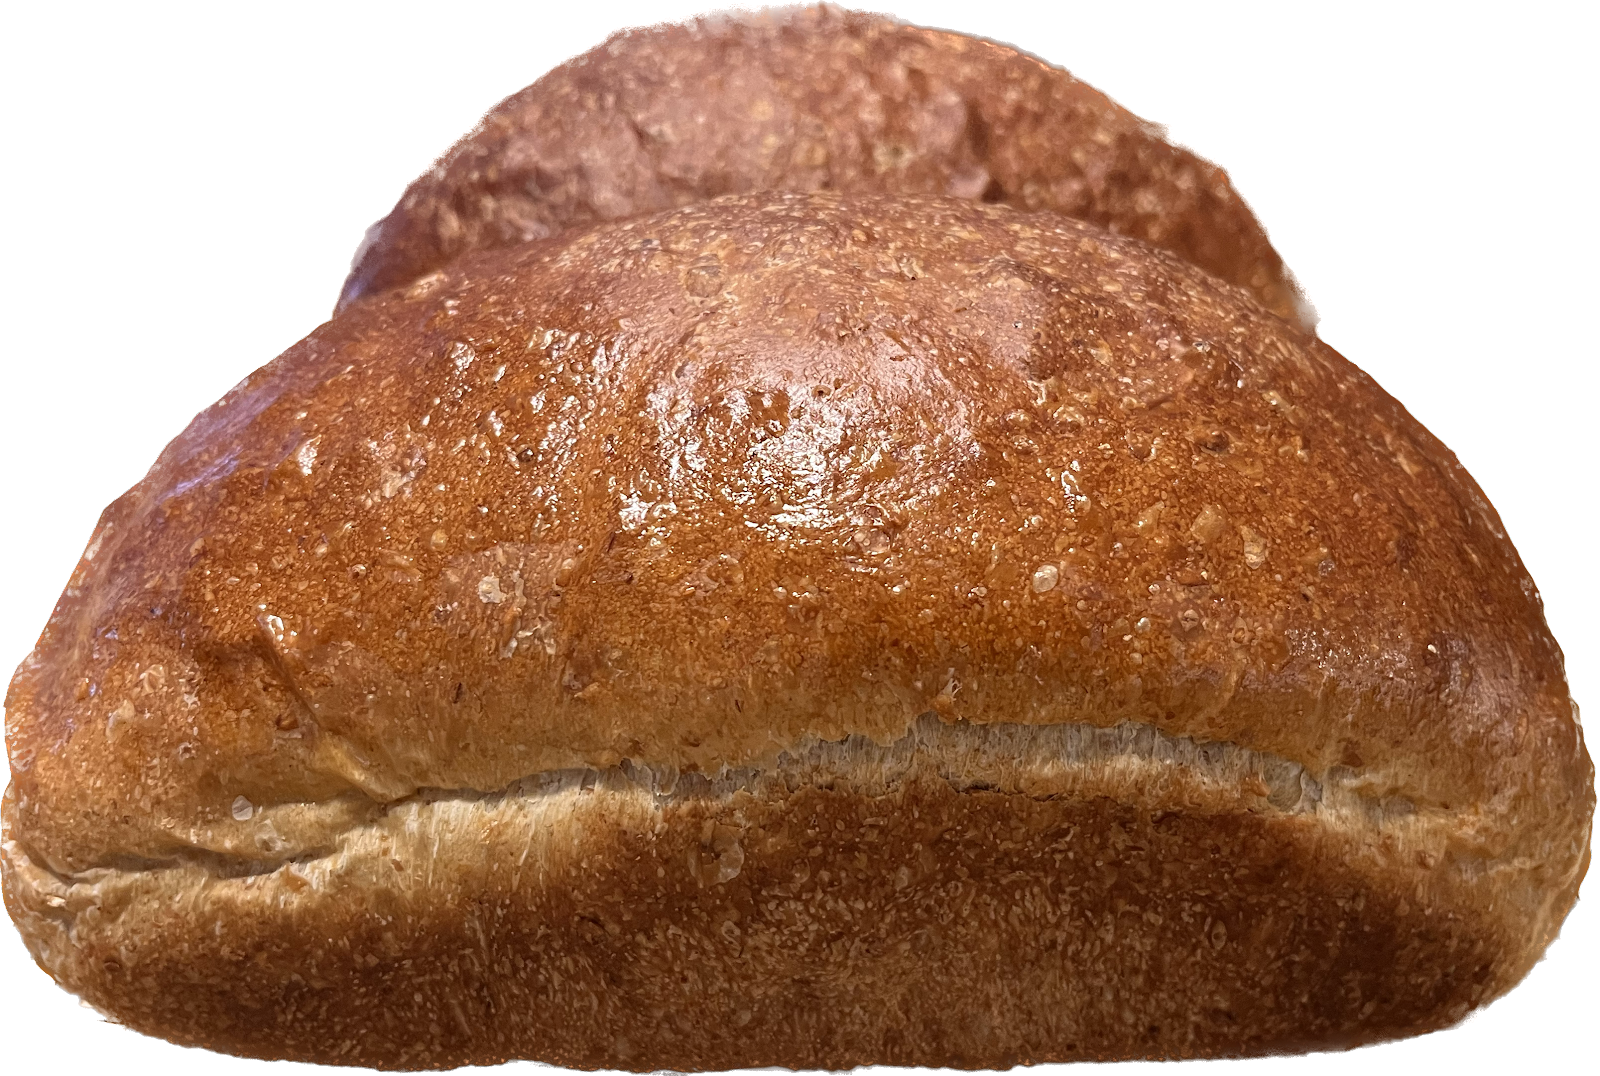
Sunday, May 26, 2024

Whole Wheat Seed Bread (a home approximation of Dave's Killer Bread)


I bake my own bread almost all the time, but when I can't my go to breads are the Grand Manan Bakery (whenever it might be open) and at the grocery store, Dave's Killer Bread. This is my closest approximation to Dave's bread (a slightly altered version that I discovered on Bread Making for Beginners).


This is how I have done it, but you may want to use other techniques and may want to add things like sprouted grains, hemp hearts or wheatgerm. I had my bread maker mix the ingredients using the dough cycle then I punched it down and shaped a loaf for a loaf pan. Here are the details...


Ingredients (in the ordered I put them in the bread maker)

1 cup of water (room temp)

1 tbsp Olive Oil

3 tbsp Molasses (you can do a mix of honey/molasses but I wanted a vegan loaf)

1/2 tbsp salt

1 cup unbleached white flour

1 cup whole wheat flour plus 2 heaping tablespoons

2 tbsp of Bread Enhancer (or Vital Wheat Gluten)

2 tbsp quinoa

2 tbsp flax seeds

2 tbsp pumpkin seeds

2 tbsp sunflower seeds 

4 tbsp of Oats (large flake)

1 tbsp active dry yeast

Instructions

It's pretty easy really. Load the ingredients into the bread maker in the order listed above and choose the dough setting.

When the cycle is done, turn the dough out onto a lightly floured surface and gently degas it (push out the bubbles). 

Shape it into a loaf and place in a lightly oiled bread pan.

Let it rise for an hour to an hour and a half (until a finger poke leaves a dent). Preheat the oven to 375 degrees.

Cook the loaf for 35 minutes and when the internal temperature is over 200 degrees it is ready (without a thermometer you can be pretty confident 35 minutes will do it, but add a minute or two if you are hesitant).

Cool on a rack. When fully cool I usually slice it and freeze it but that is totally up to you.

Enjoy!!

Monday, October 16, 2023

Oatmeal Molasses Bread

 This is a very simple recipe that turns out well almost every time. 


Put the ingredients below in a bread machine on the dough setting. 

When the cycle is complete, gently remove the dough and divide it into two 600 gms pieces Form two balls and let the dough rest while you oil two loaf pans (you can also just form batards if you prefer). Shape your loads and put them in the pans, cover with plastic wrap and let the loaves rise for about an hour and a quarter. Preheat the oven to 375 F.  Bake for 35 minutes and turn out into a cooling rack. You can lightly glaze with butter/margarine to soften the crust. 

  • 1 2/3 cups water
  • 3 tbsp powdered milk
  • 2 tbsp of olive oil
  • 2 tbsp molasses
  • 2 tsp salt
  • 1 1/4 cup whole wheat flour
  • 2 1/2 cups white flour
  • 2 tablespoons of Bread Enhancer (gluten) (Optional) 
  • 3/4 cup of oats
  • 1 1/4 tsp yeast


Saturday, December 10, 2022

Anadama Bread


This is a classic New England bread and has been around kitchens for generations. It is a very simple bread but the taste is amazing, rich from the molasses and a nice texture from the cornmeal. You will love it.

Ingredients

2-3/4 cups of all-purpose flour ( used unbleached white)
1/2 cup of cornmeal
1-1/2 teaspoons of yeast
1-1/4 teaspoons of salt
1 cup room temp water
1/4 cup molasses
3 tablespoons unsalted butter
Instructions

Whisk the dry ingredients (flour, cornmeal, salt, yeast) in the bowl of a stand mixer

In a large measuring cup or bowl, mix the water, molasses, and melted butter until molasses is dissolved

Using the dough hook, slowly add the wet ingredients to the dry, on low speed, until everything is hydrate and a rough dough forms, about 2 minutes

Increase the speed to medium-low and knead for about 8 minutes until the dough is smooth and elastic

Transfer to a lightly floured surface, knead by hand for about 30 secs and form a ball. Place the ball of dough in a lightly oiled bowl and cover with plastic wrap to rise until double in size, about 90 minutes to 2 hours. 

Grease a 8-1/2 by 4-1/2 in loaf pan and sprinkle with cornmeal

When ready, turn out on a lightly floured surface and form your loaf (google if you aren't familiar with forming a standard loaf). Place the loaf in the pan to rise, 30-60 minutes, it should be covered with lightly greased plastic wrap while rising. It is ready when a poke by your knuckle leaves a lasting mark that doesn't pop right back. 

Mist the top with water just before you put it in the oven, bake for about 40 minutes until the internal temperature of the bread is 205 degrees. 

Turn out on a rack to cool. 

Note: I'm sure this could be done by hand as well, you will likely need to keep wet hands handling the dough, but no reason it should not work, after all I'm sure the early days of New England were a bit short on stand mixers :-) 

Caramelized Chocolate Chip Cookies


 Every once in a while over the years I would have a chocolate chip cookie somewhere and go WOW, that's a good cookie. Mine were never the same. Finally I came upon this recipe and we have become addicted to these cookies, they are easily frozen and can be eaten right out of the freezer. 

Ingredients

1/2 cup white sugar

1/2 cup brown sugar

1/2 cup of butter (softened)

1 egg

1 1/2 tsp vanilla extract

1 cup plain flour

1/2 tsp baking soda

a good pinch of salt

1 cup of chocolate chips (plus a bit more for topping)

Instructions

In a mixing bowl beat the sugars and butter until fluffy, then whisk in the egg and vanilla

Mix the flour, salt and baking soda in a separate bowl

Fold the dry ingredients into the wet ingredients until the dough comes together and nothing is dry

Now stir in the chocolate chips (maybe taste a few in the process to be sure they are okay) 

Put the dough in the fridge to chill for thirty minutes

Preheat the oven to 374 degrees. 

After 30 minutes, scoop the dough onto parchment lined cookie sheets (makes between 28 and 32 cookies in my experience) remember they will flatten so not too close together. 

Press the cookies down and top with 3 or 4 more chocolate chips

Bake the cookies for 12 minutes, cool on a rack, you can eat them in a matter of minutes. 

Thursday, February 10, 2022

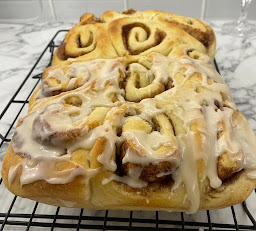
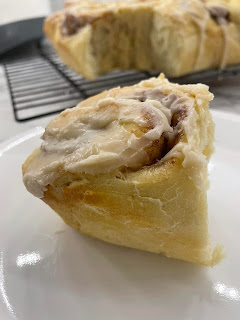
Sinful Cinnamon Buns

 These are so easy it is sinful... but taste like heaven.

Start with making the dough.

1. I used a stand mixer but a hand mixture should be great as well. Combine 2 cups of flour, 1/3 cup of white sugar, 4-1/2 teaspoons of yeast (2 packages)(yes that's a lot of yeast) and 1 teaspoon of salt and blend them. 

2. Then take 1-1/2 cups of water and 6 tablespoons of butter/margarine and microwave them together for 2 rounds of 15 secs until quite warm but not hot. Dump the whole thing into the flour mixture along with an egg. 

3. Beat for 2 minutes at medium speed gradually adding another cup of flour. Stop and scrape down the walls of the bowl, then beat another 2 minutes on high. Add enough flour to gradually have the dough form a ball (about another half cup to a cup should do it)

4. Turn out and knead it by hand for 6-8 minutes until the dough feels smooth (you will likely need to add flour as you knead the dough, it will be sticky). Form a ball and cover the dough for a 10 minutes nap.

5. The filling is simple, 1/3 cup of sugar and 2 teaspoons of cinnamon, mixed together. Soften 3 tablespoons butter/margarine to spread on the dough.

6. Use a rolling pin to roll the dough into a 10 by 15 inch square (25 by 38 cm). I always measure it to be sure. Spread the butter/margarine over the dough staying back about a half inch on the long sides. Sprinkle the sugar/cinnamon mixture evenly over the dough (i always press the sugar into the dough a bit to keep it in place),

7 Working from the long edge, roll the dough tightly and evenly as possible and pinch the seams to make a log. Cut the log into 12 pieces (I used dental floss as a cutting garrot, worked great and didn't compress the dough)

8. Gently place the cut dough into a 13 by 9 inch greased baking pan (I also use parchment, these can really stick to a pan). With cut side up (which ever side looks prettier). 

9. Cover with a towel and let rise until doubled, about an hour.

10. Pre heat the oven to 350. Bake for 25-30 minutes (I took the whole 30 minutes and sometimes even a bit more). They should be starting to turn golden brown on top.


11. Carefully turn out onto a cooling rack and let sit for at least 20 minutes.

12. While you are waiting mix 2-1/2 cups of icing sugar, 2 tablespoons butter/margarine 2 to 3 tablespoons of milk 1 teaspoon of vanilla until smooth. 

13. Spread that sweet icing over those delicious buns and enjoy!! 

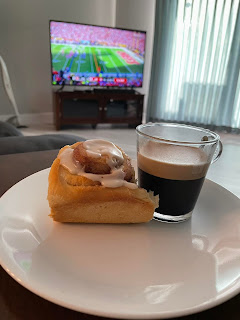
By the way... once the icing sets try separating them and freezing them... when you take them out of the freezer microwave for about 30 seconds and wash them down with a nice cup of coffee :-) 

Friday, January 28, 2022

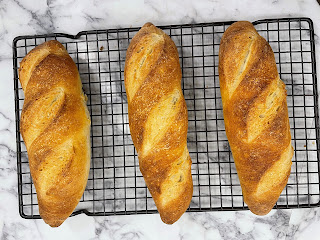
The Easy Way to have Baguettes Today


This is a very clean and simple recipe to have hot baguettes ready for supper. It really is this easy.

1. Combine 3 cups of flour (all purpose unbleached is what I used), 1 to 1 & 1/4 cups of lukewarm water, 2 teaspoons of yeast, and 1&1/2 teaspoons of salt in a large bowl and mix manually until you have a shaggy dough evenly hydrated (just takes a minute or two)

2. Cover the bowl and let the dough rest for 30 minutes

3. Knead the dough by hand (about 10 mins) or mixer (about 7 mins) until smooth. Transfer it to a lightly greased bowl and cover. Let it rise for about 90 minutes (they always say until doubled in size but I have no idea how to measure that in real life so I go by time).

4. Fold the dough over on itself several times (I actually kneaded it just for a minute or so) then return it to the bowl and let it proof for another 90 minutes. 

5. Divide the dough into three portions  (I recommend actually weighing them to get them as even weight as possible). Roll them into balls and let them rest for 5-10 minutes. 

6, Shape your baguettes. If you don't have a method already, I found this video works well  https://www.kingarthurbaking.com/videos/baking-skills/how-to-shape-a-baguette  

7. Gently place your baguettes on parchment on a baking sheet or if you are using a baking stone in the oven, just on the parchment and use your peel to place them in the oven when ready. I used a baking stone and pizza peel, so just placed them on parchment. Cover the baguettes for the final rise, it takes about an hour. 

8. Preheat the over to 450F 

9. When the baguettes are ready, the dimple you make by pushing your finger into the dough, should linger afterward, then you are ready. 

10. Make 3 diagonal slices in each and slide them into the oven, give them a good spray of water just as you are closing the oven on them. 

11. Bake at 450F for about 20-25 minutes (I was closer to 25) they should be a deep golden brown on top. 

12. Now you have 2 options, you can cool them on a rack on the counter, or you can turn off the oven, take the pan out but return the baguettes to the oven directly on the rack to let them cool (with the oven door cracked open a couple inches). Either way, you should get great results. 

Try to wait until they are cooled to cut them... good luck with that :-) 


Wednesday, August 25, 2021

 So Simple, So Good Bread

This is such a simple loaf that turns out so great I almost think I should keep it a secret 😊 

I have been looking to have a quick and easy way to have a high quality loaf of bread in under 3 hours and I think this may be it. The key is to use a few shortcuts without any feelings of guilt, effort isn't the only way to create quality, sometimes just thinking it through and using the right options can work.

Here's how to do it... take all the ingredients listed below (I got them all in a standard grocery store), throw them into your bread maker on the dough setting (in the order recommended by your machine, typically wet to dry).  

When it is completed, take the dough and form two equal sized balls and let them sit for 5 minutes (I don't know why, just every recipe seems to say that, apparently the dough needs to rest ).  Then shape them into two batards (torpedo shaped loaves) and cover them with plastic wrap sprayed with Pam or something similar.  Let them sit for about 45 minutes on parchment paper (they are ready when you poke them with your finger and the dent remains). Being on parchment paper makes it easy to move them into the oven, just keep the loaves on the paper,  In the meantime fire up your over to 450 degrees and have a spray bottle of water on hand. If you have a baking stone (or pizza stone) put that in the oven when you turn it on, if not you can use a baking pan without pre-heating.  When the dough is ready, slash it with a razor blade or very sharp knife (3 diagonal slices are a good way to start, play with that on future loaves), slide the loaves into the oven (a pizza paddle is ideal but you can use any flat pan).  Immediately spray the loaves and the oven with your spray bottle and shut the oven quickly to not lose too much heat. Bake for 25 minutes (internal temperature of the loaves should exceed 200 degrees if you have a thermometer for that, otherwise 25 minutes should do it).  Turn the oven off and crack the door, but don't remove the loaves for another 5 minutes.  Let them cool on a rack for as long as you can endure.  Once totally cooled I usually slice one and put it in the freezer for future
use (great toast right out of the freezer).  ENJOY.

Ingredients

-1 and 2/3 Cups of water

-1 tablespoon of sugar

-2 and 1/2 teaspoons of salt

-4 and 1/2 cups unbleached white flour

-Half a cup of 12-grain cereal (uncooked) (I use Speerville Mills St John Valley Cereal)

-2 tablespoons of gluten (I use Fleishman's Bread Booster) 

-2 and 1/4 teaspoons of dry yeast (I use Platinum Instant Sourdough Yeast)

Sunday, April 18, 2021

Indecision Bread

I was looking to bake some bread for toast and sandwiches and couldn't decide between, using oatmeal, bran or 12-grain cereal in the recipe so, in the end I just put them all in, and am I ever glad I did, the result was delicious.  It is really easy to make, I used my bread maker to make the dough then baked it in the oven in a longer loaf pan.  I'm sure it would work equally as well in a mixer or by hand. 

It really is simple.  Load the ingredients in your bread maker in the order below (or as instructor by your machine instructions).  Use the dough cycle, when finished shape the loaf and put it in a greased pan to rise (45 mins to an hour for me).  When you can poke it gently and leave a dent it is ready to go.  Bake in the oven at 375 for about 35 minutes until the internal temperature is 200.  Then turn out onto a rack to cool.  Enjoy 

Ingredients

  • 1 2/3 cups water
  • 3 tbsp powdered milk
  • 2 tbsp of olive oil
  • 2 tbsp molasses
  • 2 tsp salt
  • 1 1/4 cup whole wheat flour
  • 2 1/2 cups white flour
  • 1/4 cup of oats
  • 1/4 cup of bran
  • 1/4 cup of 12-grain cereal
  • 1 1/4 tsp yeast
  • 2 tablespoons of Bread Enhancer (gluten) (Optional)  


Tuesday, December 29, 2020


Faux Sourdough

 The Simplest Sourdough you could ever make!  Is it as good as true sourdough? Not really, but it is very close with only a portion of the time and effort sourdough requires. 

This truly is a very simple just throw all the ingredients in your mixer, with the beater paddle to start, then switch to the dough hook and knead it for 7 minutes. You could likely use a bread machine to mix the dough as well, but I haven't tried it. 

Put the dough in a lightly oiled bowl and let rise for about 90 minutes.  Then turn it out on a lightly floured surface and divide into two equal parts (I always weigh it to get even loaves).  Shape the loaves as you prefer, I tried both boules and batards and they were equally successful.  Let the loaves rise for about an hour or until a finger poke leaves a lasting dent in the bread. I baked these in a very hot oven of 450 for 30 minutes but you need to watch them for burning on the top, it might be wise to go a bit lower and longer.  Providing some steam is a good idea as well, I just spray the hot oven with a mister when I slide the loaves in.  These were baked on a steel slab but a pizza stone would work fine.  The boule was done in a Dutch oven.  

Ingredients

4.5 cups Unbleached Flour

1 tablespoon sugar

2.5 teaspoons salt

1 2/3 cups of lukewarm water

THE SECRET INGREDIENT

1 package (18 gms) Platinum Instant Sourdough (Yeast and Sourdough Culture) If your grocery store doesn't have this you can order it on Amazon. 


Monday, October 26, 2020


 12-Grain Bread

This is a variation of a recipe I use often, it starts in the bread maker then comes out to be shaped as a loaf for the oven.  This particular loaf was done in a longer pan to make a nice sandwich/toast size slice. 

I used bread enhancer for this one (basically additional gluten), sold as Fleischman Bread Enhance locally but any gluten should work fine. 


1 2/3 cups water
3 tbsp powdered milk
2 tbsp of olive oil
1 tbsp honey
1 tbsp molasses
2 tsp salt
1 1/4 cup whole wheat flour
2 1/2 cups white flour
3/4 cup 12 grain cereal uncooked
1 1/4 tsp yeast
5 tsp gluten 

After the bread machine complete the dough cycle, shape a loaf and put it in a lightly oiled loaf pan.  Let rise 1-1.5 hours covered with an oiled piece of plastic wrap.
Bake at 375 for 40 minutes, then when you remove the loaf, rub the top with butter to stop it from drying it out (that's from my Mom). 

Tuesday, March 17, 2020

Quarantine Bread


I am home under self-quarantine for Covid-19 after International travel so had some time on my hands and no groceries in the cupboards.  I threw this in the bread making on dough setting:


1- 2/3 Cups of skim milk
2 tbsp vegetable oil

1 tbsp honey
1 tbsp molasses
2 tsp salt
1-1/4 cup whole wheat flour
2-1/2 cup unbleached white flour
3/4 cup mix of flax and chia seed
1-1/4 tsp yeast

After the dough cycle is done, either put in in a loaf pan (I used a sandwich length loaf pan, I love those) or shape it into a batard (torpedo shape).  Let it rise for about 90-120 minutes.

Bake at 375 for about 40 minutes (internal temperature of 200 degrees is a good sign).

                                                                Cool on a rack as long as you can stand it.

Sunday, September 15, 2019

Oatmeal Bread

This is a lovely bread for a hearty toast on a crisp Fall morning.  I started it in the bread maker for convenience but you could also use a stand mixer bread hook or even mix and knead as you please.

Ingredients
1 and 1/3 cup of water
3 Tablespoons of honey
2 tablespoons of olive oil or vegetable oil
3/4 cup of quick oats
1 and 3/4 teaspoons of salt
3 and 3/4 cups of bread flour (all purpose works as well)
2 tablespoons of oat bran (likely is optional but haven't tested that)
2 tablespoons of dry milk
2 tablespoons of active dry yeast


Add the ingredients to the bread making starting with the liquids. including the water, oil and I add the salt at this stage as well (or as you bread machine advises)  then the dry ingredients starting with the flour, milk powder, then oats, oat bran  and finally yeast.  I'm not sure that order is important to be honest but it seems to work.

Put the Bread machine on the dough setting.  When it is complete, turn the dough out onto the counter (try to avoid using additional flour, this bread can get dry quickly so retain moisture as much as possible).  Knead for a minute or two to be sure the dough is smooth and strong (the internal dough should be around 80 degrees). 

Take a loaf pan, spray lightly with oil.  Shape your loaf and put it into the loaf pan seam side down.  Put the entire pan into a loose grocery bag trying to not let it fall onto the dough.  Leave it in the bag to rise for about an hour. 

Bake in a pre-heated oven at 375 for about 30 minutes or until the core temperature is 200 degrees C. 
Remove and turn out onto a rack for cooling.

Let the bread cool before cutting into it (the smell will make that difficult) 

Enjoy this hearty bread as toast or make a sandwich for your lunch and watch your coworkers drool.


Friday, September 28, 2018

Maple Porridge Bread

This is a great multi use bread, great for toast or sandwiches.  I try to build in a little New Brunswick flavour whenever I can and in this case the porridge and Maple syrup are from right here in NB.

The simplest way to do this loaf is to make the dough in the bread maker but then transfer the dough to a long loaf pan and bake in the oven.  But you can do it by hand or mixer if you prefer, you will just need to add about a 90 minute proofing stage before shaping the loaf.

Here is how I did this particular loaf. 


Start with the porridge, I used Saint John Valley cereal and cooked it as directed on the package... with one exception, instead of simmering for 5 minutes I put the cereal in the boiling water, stirred it, covered it and set it aside off the heat for 5 minutes so it wouldn't overcook.  When it is done, strain it and run cold water over it until cool... shake out as much water as possible and dry with paper towel as much as possible... it should be cold and somewhat dry (but it will still be wet)

Meanwhile, in the bread maker combine the following:

1 2/3 cups of water
3 tbsp powdered milk (I have used both skim milk ans soy milk powders with equal success)
2 tbsp olive oil
2 tbsp maple syrup
2 tsp salt
1 1/4 cup whole wheat flour
2 1/2 cups unbleached while flour
3/4 cup of porridge 
1 1/4 tsp yeast

After the dough cycle is complete remove the dough to a floured surface.  It will be sticky and a bit tough to handle, use flour to help with that.  I use a long loaf pan (16 inch) and spray it with Pam (NOTE: in a regular loaf pan it will be a very tall loaf and tricky to manage). 
Shape the loaf and put it in the loaf pan for about an hour.  While that is happening, preheat the oven to 375 degrees.  I baked it to an internal temperature of 200 which took about 30 minutes.  Turn it out to a rack and let it cool before cutting... it is worth the wait.

Thursday, January 19, 2017

English Muffins


These are YUMMY but a little tricky to cook in the skillet, it may take a few tries to get them to be cooked through but also not burnt on the surface. It is worth the effort. 


Ingredients

  • 1 cup milk
  • 2 tablespoons white sugar
  • 1 (.25 ounce) package active dry yeast
  • 1 cup warm water (110 degrees F/45 degrees C)

  • 1/4 cup melted shortening
  • 6 cups all-purpose flour
  • 1 teaspoon salt

Directions


  1. Warm the milk in a small saucepan until it bubbles, then remove from heat. Mix in the sugar, stirring until dissolved. Let cool until lukewarm. In a small bowl, dissolve yeast in warm water. Let stand until creamy, about 10 minutes.
  2. In a large bowl, combine the milk, yeast mixture, shortening and 3 cups flour. Beat until smooth. Add salt and rest of flour, or enough to make a soft dough. Knead. Place in greased bowl, cover, and let rise.
  3. Punch down. Roll out to about 1/2 inch thick. Cut rounds with biscuit cutter, drinking glass, or empty tuna can. Sprinkle waxed paper with cornmeal and set the rounds on this to rise. Dust tops of muffins with cornmeal also. Cover and let rise 1/2 hour.
  4. Heat greased griddle. Cook muffins on griddle about 10 minutes on each side on medium heat. Keep baked muffins in a warm oven until all have been cooked. Allow to cool and place in plastic bags for storage. To use, split and toast. Great with orange butter, or cream cheese and jam.

Sunday, February 14, 2016

Buttermilk rolls in a Skillett

I've started playing around with my skillet for baking and loved the results.  If you scroll down the blog posts you can find the recipe for these rolls.  Be prepared for some tough kneading, it is a dense dough.

Sunday, January 10, 2016

Oatmeal Chocolate Chip Muffins


Ingredients

  • 2 eggs
  • 2/3 cup brown sugar
  • 1/2 cup vegetable oil
  • 1/2 cup milk
  • 1 cup all-purpose flour

  • 3/4 cup instant oatmeal
  • 1 teaspoon baking powder
  • 1/2 teaspoon baking soda
  • 1 pinch salt

Chocolate Chips (1/2 to a full cup)  (optional)

Instructions

This one is truly easy:

1. preheat the oven to 400 F
2. mix the eggs, sugar, oil, milk and whisk them until smooth
3. mix the flour, oatmeal, baking powder and soda, salt and add it to the wet ingredients to make a smooth batter... add chocolate chips if you want them 
4. Grease the muffin pan or use muffin cups and fill to the top
5. Bake for 20 minutes or until a toothpick comes out clean


Tuesday, December 29, 2015

Pain d'Epi

This is one of my favourite breads to make, it almost always turns out and it is very easy to do... yet it has a certain flair.  It is great when eating with friends to just tear off a piece of the "stock" and spread it with butter.  Use the Rustic Bread (not Rustic Italian, the earlier version, I've never tried it with the Italian but that might work too), recipe posted below but make baguette size loaves.   Then with a pair of scissors make 45 degree cuts 1/2 way through the loaf and fold oven to alternating sides.   Bake as for the Rustic Bread but 5-8 minutes less (watch for burning, internal temp should be about 200).

Tuesday, March 10, 2015

A fun day Baking

It was a fun day of baking this past weekend.  I started out to make some bagels and a Rustic Loaf (the recipe is earlier in this blog).  Then started to play around with a braid and an attempt at a bunny bun.  I'll keep working on the bunny bun :-)
If you would like to do the braid it is very simple.  Just use some of the dough you made for the rustic bread, divide it in 3 and roll each piece about as thick as a large hot dog and braid the 3 pieces together.  Let it rise for about an hour then give it an egg wash (egg white and a table spoon of water brushed on the top of the dough) Sprinkle with seeds (I used poppy on one strand of the braid and sesame on the other two) and bake at 450 for 20-25 minutes (until the top is brown and it sounds hollow when tapped on bottom).  We tried to let it cool but it was still warm when we started pulling pieces off and smearing them with butter.

Sunday, March 2, 2014

Oatmeal Brown Bread


Ingredients
2 tsp sugar
1 cup lukewarm water
2 pkg. yeast
2 cups rolled oats
3 cups boiling water
2/3 cup Crosby’s Fancy Molasses
4 tsp salt
¼ cup melted butter
7 cups flour
Instructions
Mix sugar, water and yeast, let stand 10 minutes
Soak oats in hot water. Cool.
Add molasses, salt, butter and yeast to cooled oats. Blend.
Gradually mix in flour, knead until smooth. Place in a greased bowl,
cover, and allow to stand in a warm place until double in bulk.
 Knead lightly and place into two greased loaf pans
- Makes 2 Loaves -. Cover, let stand in warm
place until double in bulk. Bake at 350ºF for 40 minutes.